
Printing and cutting using a 3rd party RIP
Adding a contour cut path
- Open your design
- Add a contour cut path by selecting the design, and choosing Effects and then Contour Cut.
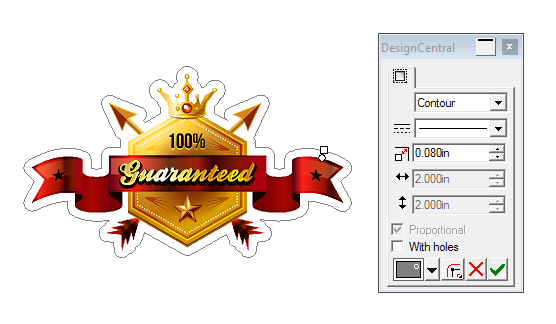
- Adjust the distance from the object to the contour cut path using the handles or in DesignCentral
- Click Apply
If the design is a bitmap, you may need to make the background transparent so the contour cut path goes around the object instead of around the bounding box of the bitmap.
To do so :
- Select the bitmap and choose Effects and then Make Transparent.
- Set the tolerance in DesignCentral
- Click in the background to select the area that needs to be made transparent
- Click Apply
Adding Registration Marks
- Select the objects with contour cut path
- Choose Effects and then Contour Cut Mark
- In DesignCentral, select the desired Registration Marks
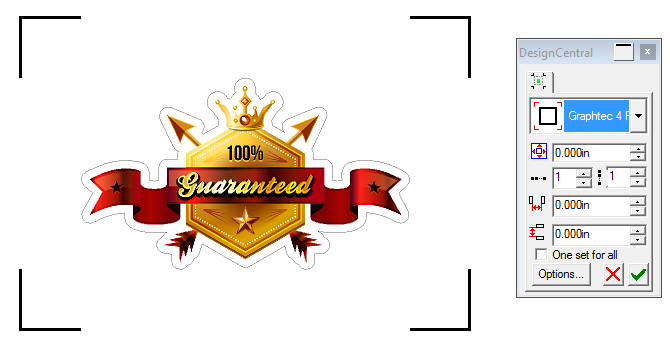
- Click Apply
Printing the design to your Desktop Printer
- Make sure your printer is ready to start printing
- Click File and then Print
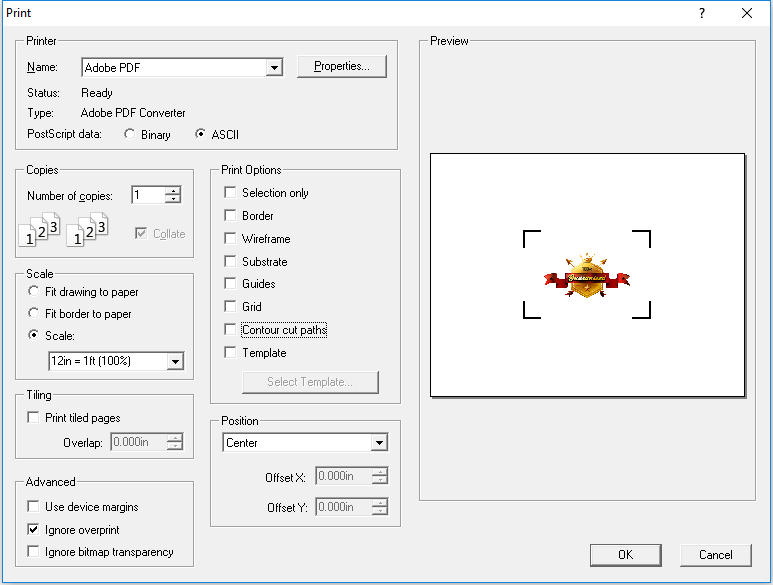
- Click OK
Contour cutting the printed job
- Load the printed sheet into the cutter
- Click the
 button
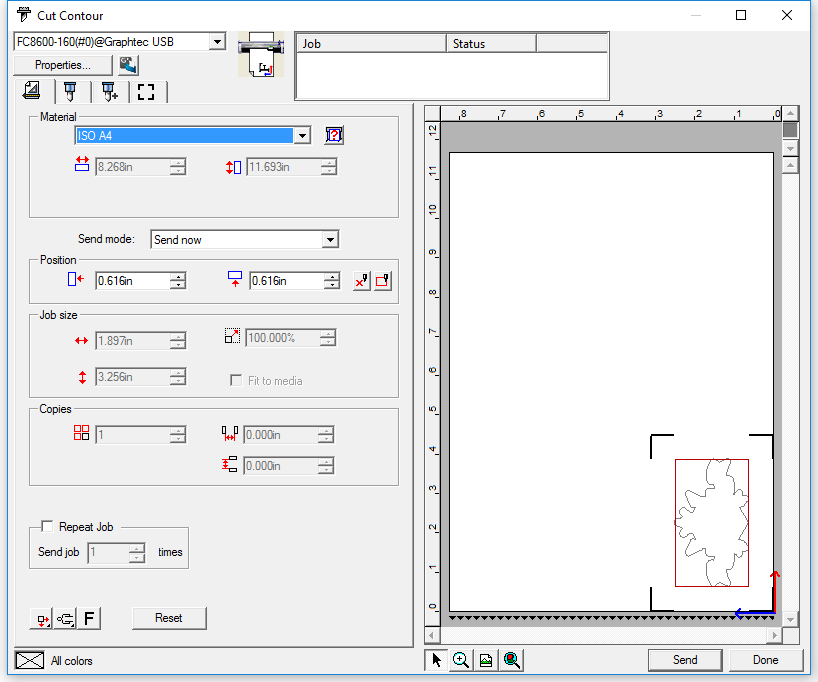
- Click the Send button
The cutter will start looking for the registration marks, and when done will cut the contour cut path.